10 Top Tips to Organize your Fabric for Scrap Quilting
Organize your fabric scraps so they are ready to use when you want to make a scrap quilt.
This post may contain affiliate links which means if you purchase a product through one of my links I may be paid a commission, without any additional cost to you.
If you love to quilt, you’ll definitely have a lot of fabric scraps. The most common challenge when it comes to these leftovers is storing them in an organized manner. Some sewers keep only the larger pieces, while others choose to save even the tiniest piece. But the question stays the same: how to store fabrics scraps so they are organized and ready to use.
We have gathered ten of our favorite tips so you can get right to cutting and sewing when the urge strikes to make a scrap quilt.
1. Use a container to save all your scraps as you work on projects.

If you have made a couple of quilts you have likely discovered that the scraps multiply quickly. Of course, you hesitate to throw away the leftovers because (1) you invested your money in purchasing that fabric, (2) finding a purpose for the extra is a more sustainable and environmentally sensible choice, and (3) it’s in our quilting DNA that we do something with all the fabric. It’s the frugal “use it up” sensibility.
But, those scraps multiply quickly and can overwhelm your work space if you don’t have a system for storing scrap fabric. You want something that is easy to access so you will use it. What to do with those scraps will be addressed in the next several topics.
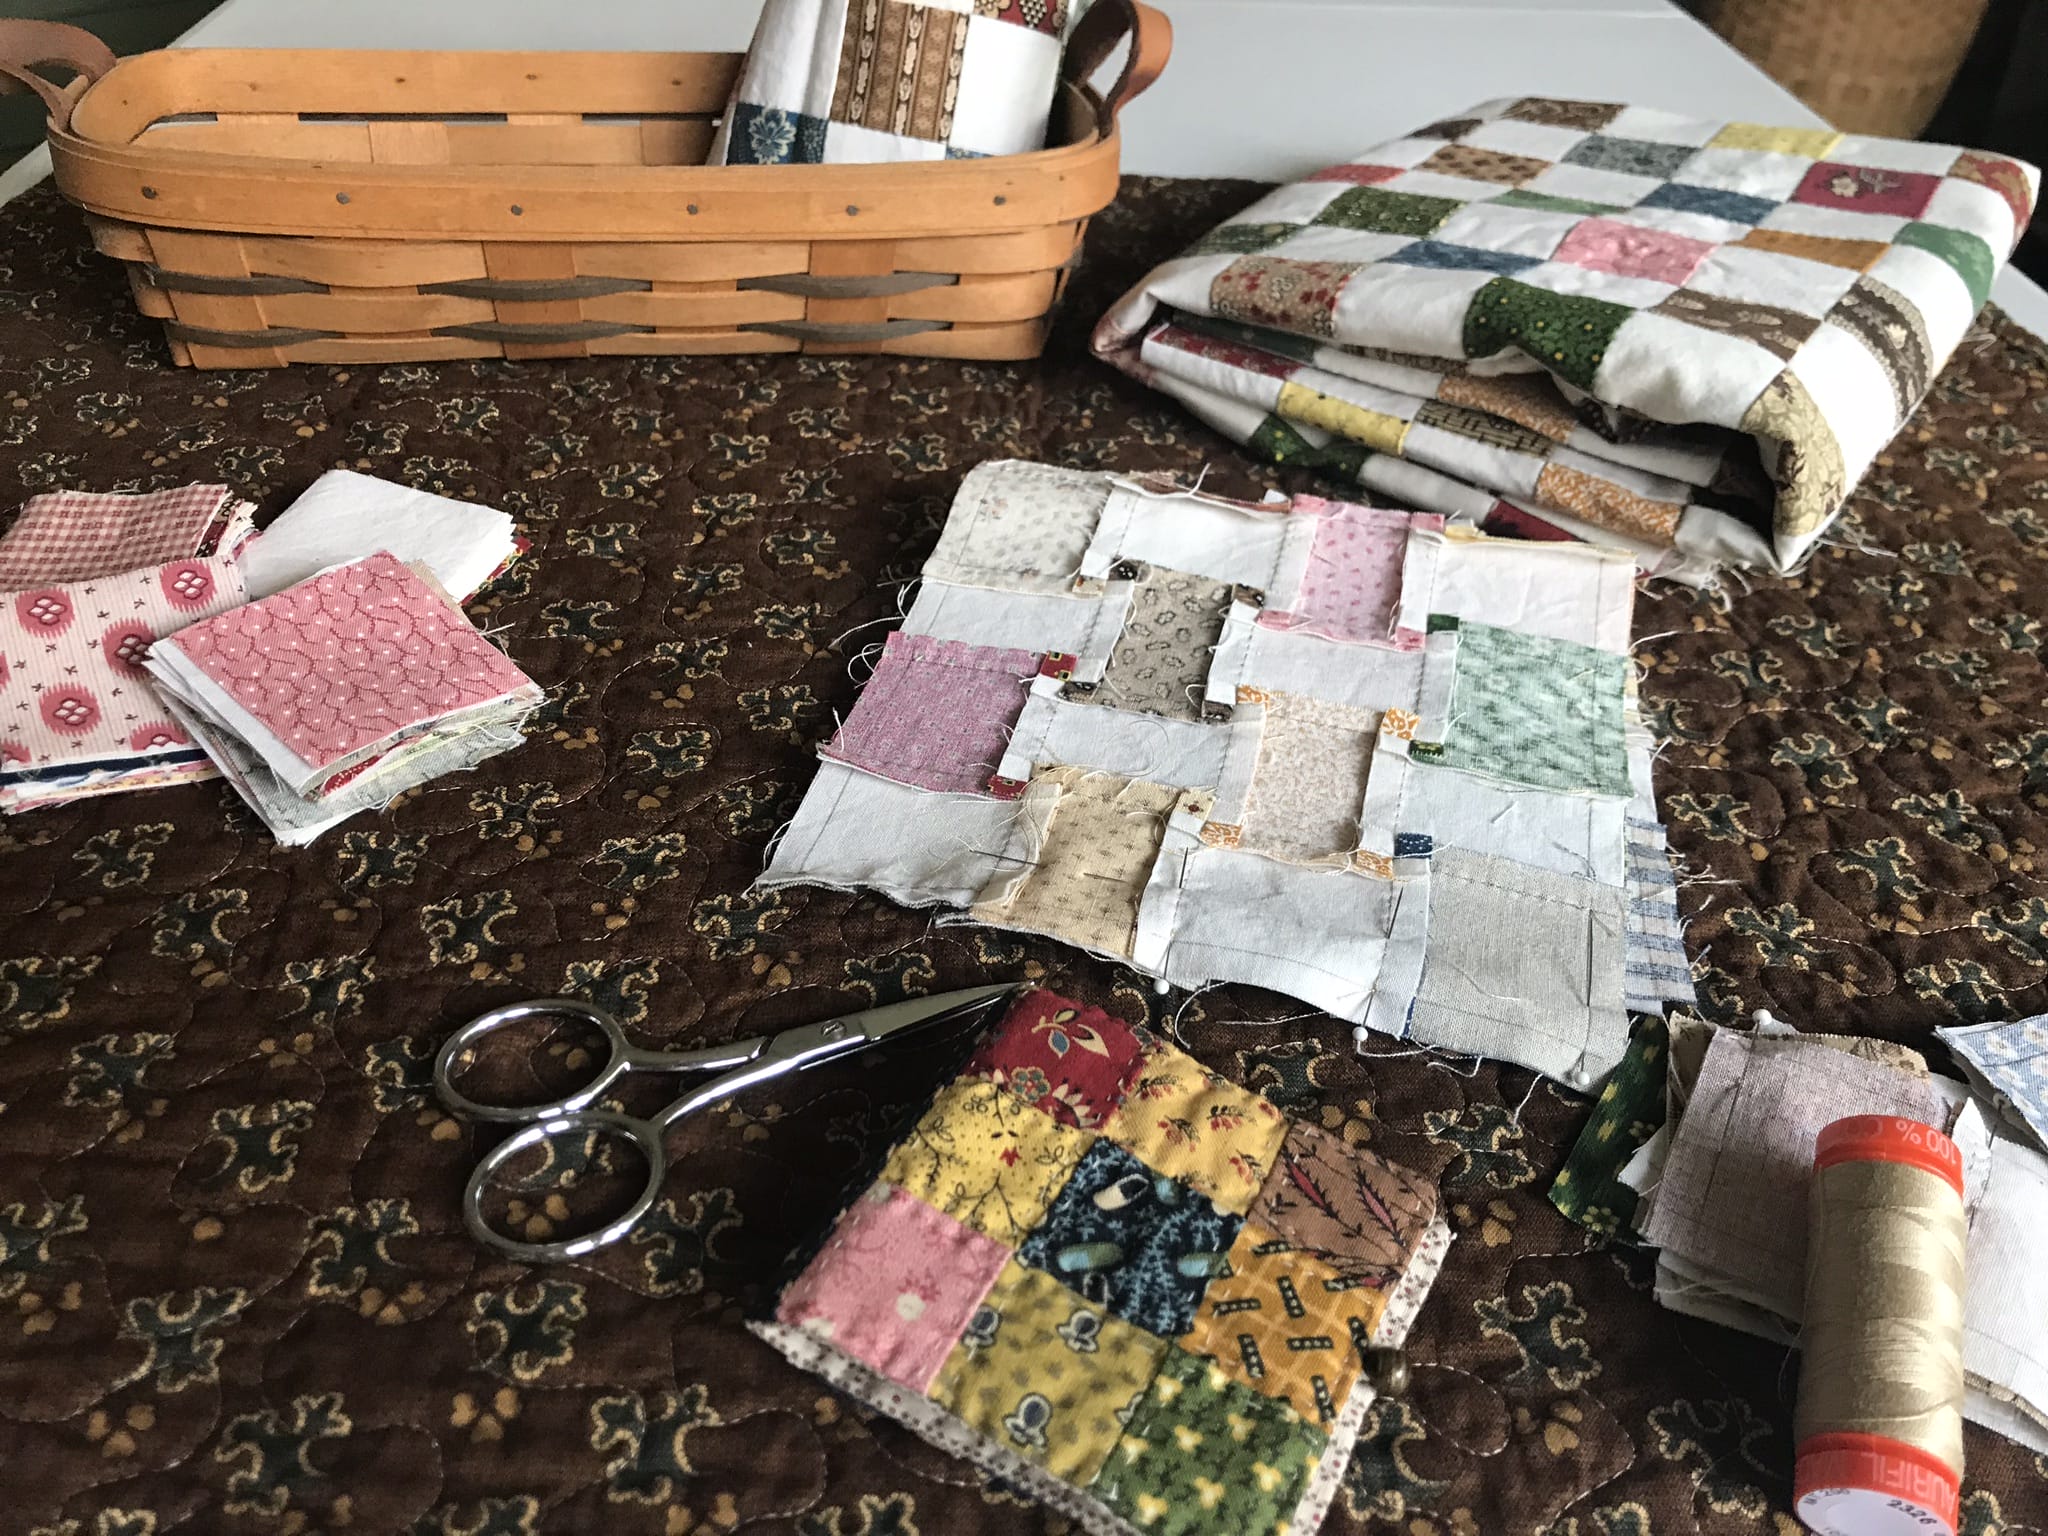
Start with designating a container for collecting your scrap fabrics as you are working on your projects. Get something durable and large enough to hold pieces in varying sizes and to keep them fairly flat. A wrinkled mess of fabric scraps isn’t as inspiring as a pressed pile of pieces ready to be used in a scrap project.
Throw your scraps in it as you work to keep your worktable clear of fabric clutter. It took me a long time to learn that. I used to save them in a spot on my cutting table and eventually I wound up with a whole lot of clutter and just a tiny spot on which to cut. I’ll keep working on practicing what I preach.
Next, you’ll identify which system you want to use to organize your scrap fabrics.
2. Process your scrap fabrics

What does that even mean? Well, if you are a hard core scrap organizer, this can be a very involved process. You will need to decide how much effort you want to put into the system you use to store scrap fabrics. Will you do it by color, style, size, or a combination of categories?
AllPeopleQuilt.com has a post that includes a quiz that will help you determine “your ideal scrap saving philosophy.” I found it interesting that one of the solutions to how to save scraps is to donate them.
When your catch-all basket, bag or box starts to fill up, it’s time to “process” your scraps. That means taking the pile of scraps and sorting them however you want to store them to – and this is the important point – make them easily useable for future projects.
Size is an important consideration in deciding what is a scrap versus what is still part of your general fabric stash. For me, anything that is a fat 1/8th or larger is still part of the stash. Anything less than a fat 1/8th and bigger than about 1-inch is stored in plastic baskets by color.
You should also remember these words: You don’t need to keep all of your scraps! If there are fabrics you just don’t want or like anymore you can donate them, sell them by the bag, share with others at workshops or quilt retreats, use as stuffing for pillows or other projects, or any other great and sustainable ideas you might have.
3. Sort by color

I find organizing by color to be the most convenient way to store scraps for designing and planning scrap quilts and that’s the extent of my sorting/storage criteria for most of my scraps. Color sorting works for most of us but your quilting preferences and fabric stash might be different so you should find what works best in your personal circumstances.
I have a special stash for some tiny pieces, 1-1/4″ x 7/8″ that I use in what I call my “therapy” quilt. That’s a tiny quilt I make whenever I need a mood boost or want to cheer up a friend with a little quilted gift.
4. Sort by shape
Another way to sort and categorize your scrap stash is by size and shape. Think of it as making your own precuts. I mainly mean strips and squares. Shapes you commonly use in quilting or can quickly use to get other shapes, like rectangles and triangles.
Sometimes, I will cut a few strips in different widths off new yardage or fat quarters. I determined what size strips I use the most and cut those. I don’t try to cover every possible size I think I’ll ever use. The most helpful ready to use sizes for my quilting are 1-1/4″, 1-1/2″ and 2″. Remember, I make mostly small blocks. Your most common widths might be 3″, 4″ or larger if you prefer bigger blocks and/or bigger quilts.
I also like to have a big selection of squares cut in sizes I use a lot. This is more tedious scrap processing but if you do a little bit each day you can build up a nice selection of precut squares that are the exact size you need and ready to use for a quilt. Again, pick the sizes you plan to use most often. Mine are 1″, 1-1/2″, 2″ and 2-1/2″.
It’s so satisfying to be able to pull ready to sew squares out and start making a scrap quilt without having to cut tiny pieces first. These are particularly handy for making very scrappy nine patch blocks.
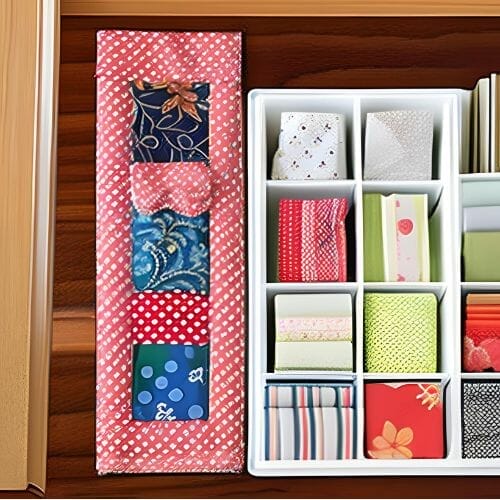
Plexiglass or bamboo drawer organizers work really well for storing various sizes of squares. These are two types I found on Amazon that I like a lot. I have the Ruboxa 25 piece clear drawer organizer and the units come in several sizes and shapes and are just perfect for holding the precut pieces.
The Royal Craft Wood Luxury Bamboo Drawer Organizer is an attractive option if you like to have precut pieces out on your cutting table. The bamboo units also fit in my hand sewing boxes. Check out this post on How to Make a Travel Handstitching Kit to see what I mean.
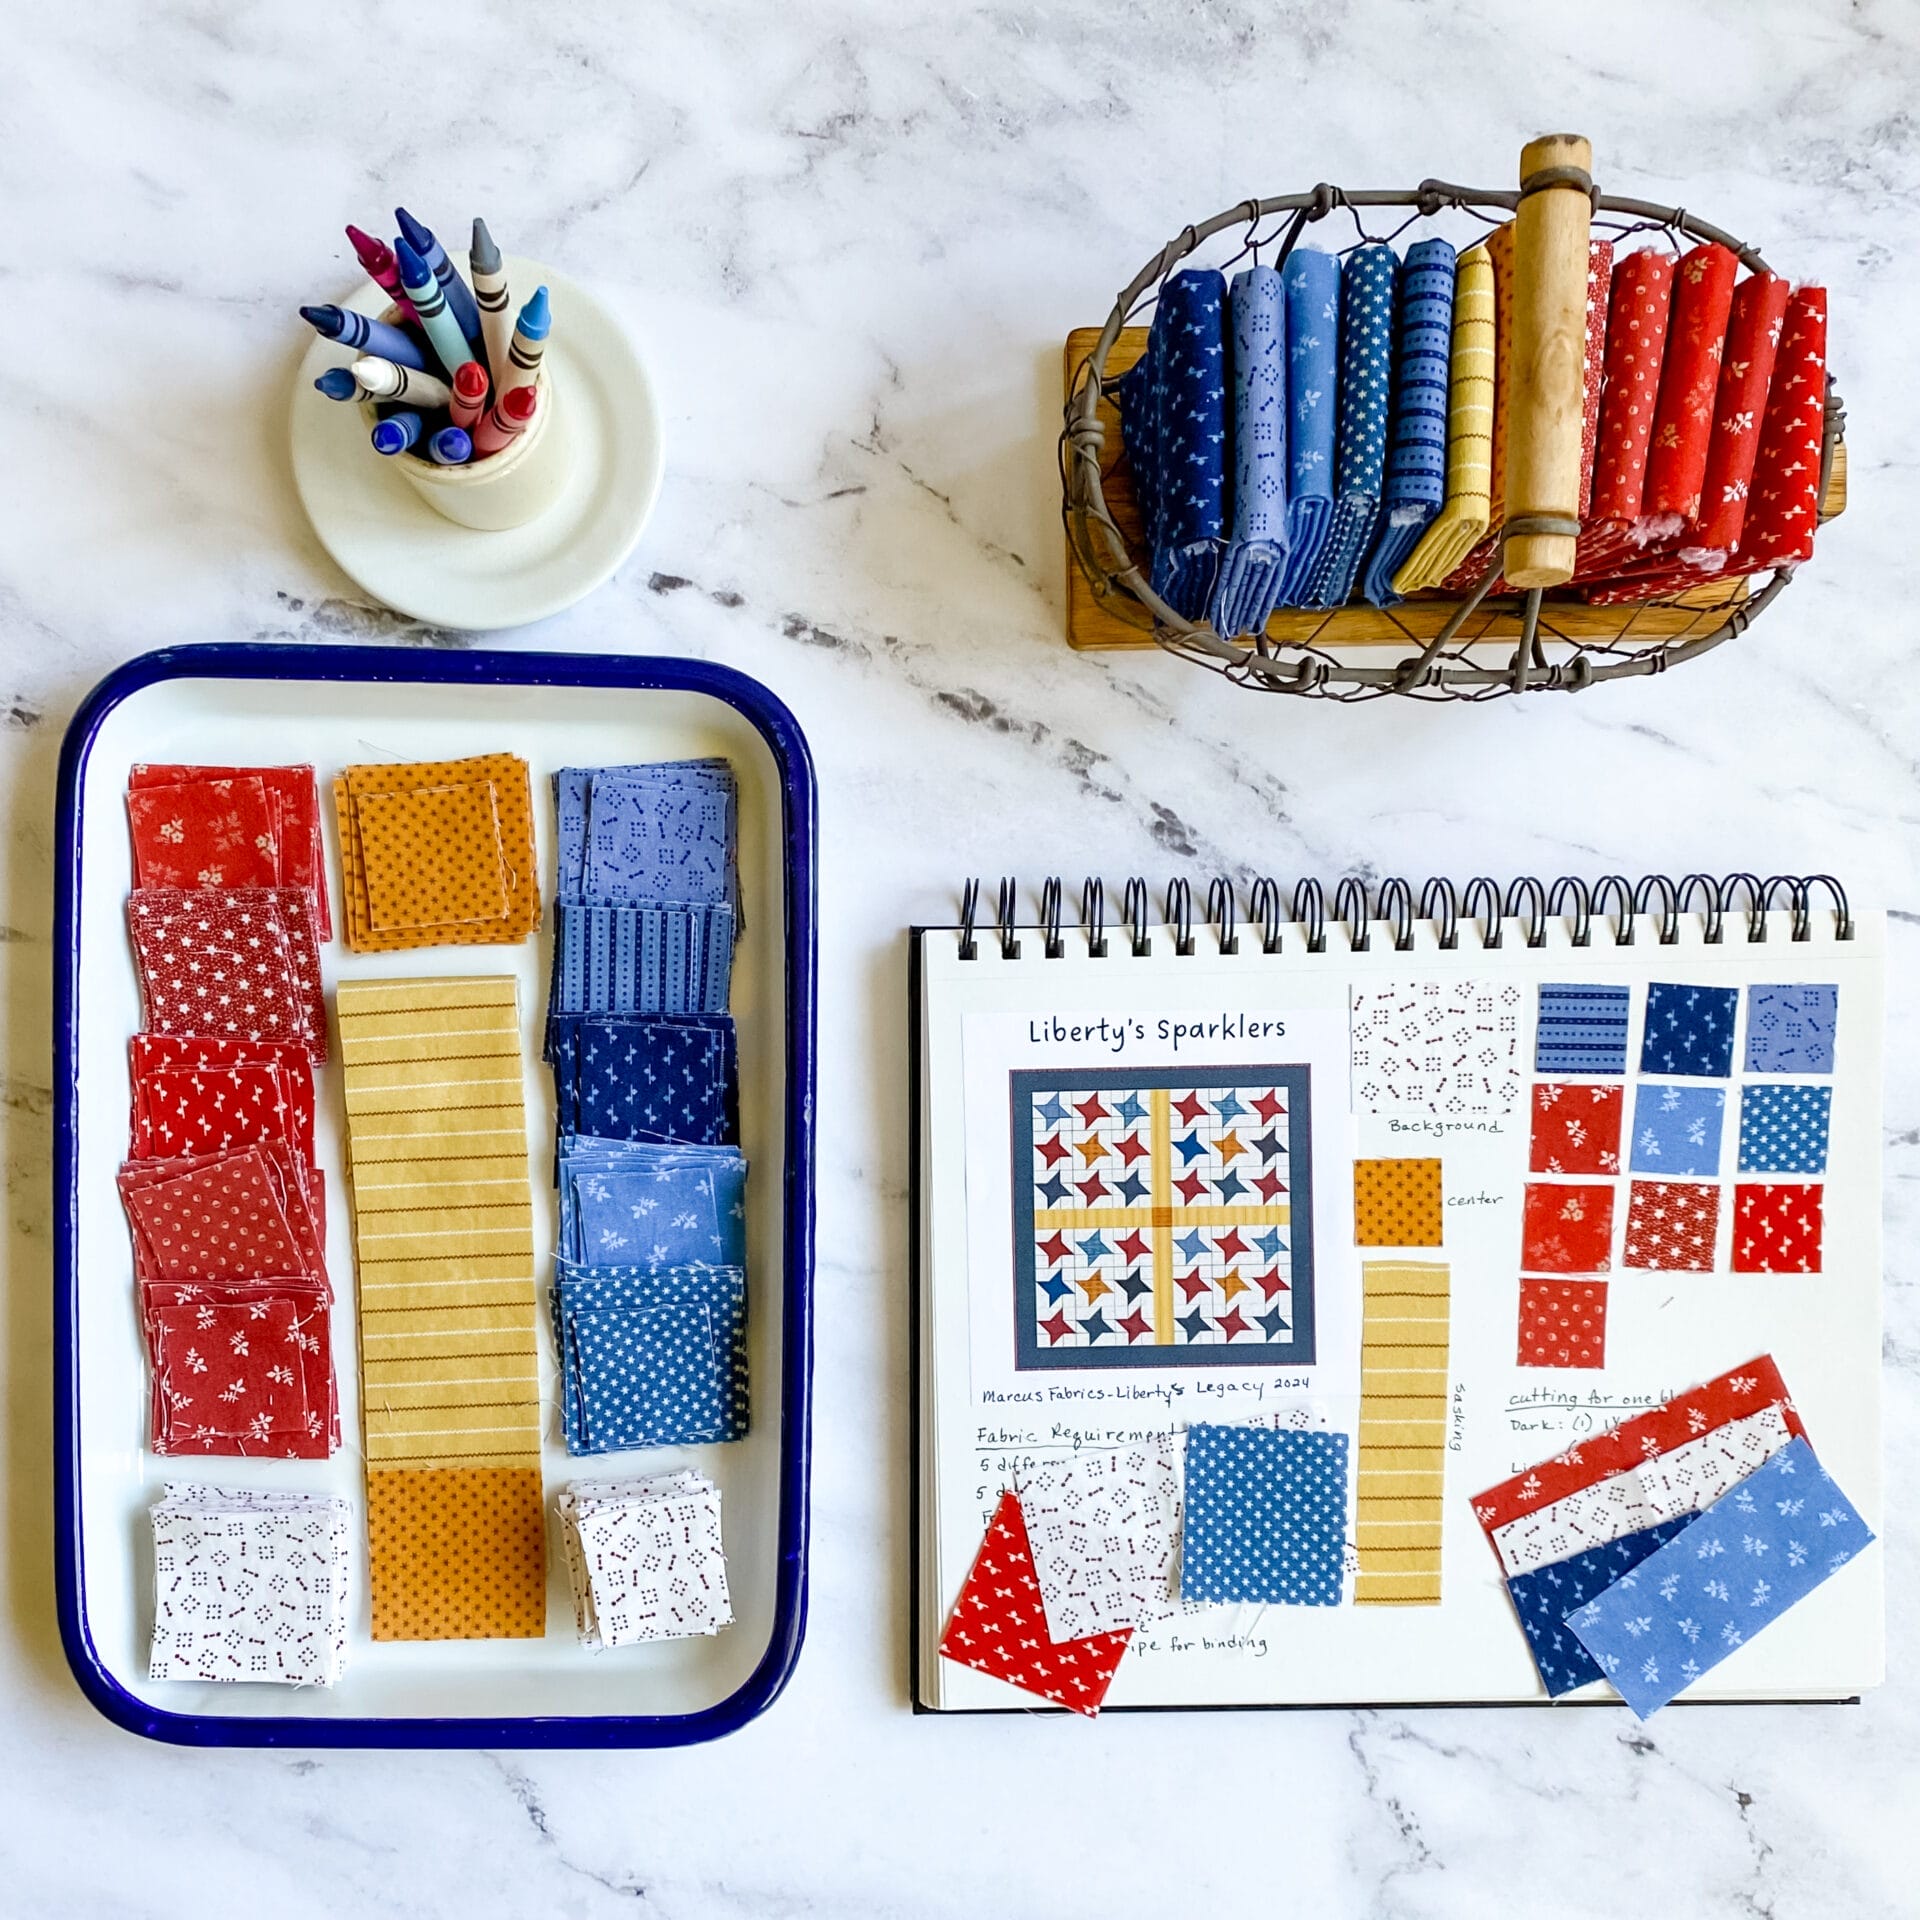
5. Make little quilt kits for scrappy blocks

This is my favorite scrap organization tip. Just like I am a fan of having a bunch of precut squares ready to start sewing, I also like to have scrappy quilt block kits ready to do the same.
I have a lot of scrap quilts in progress. As I’ve already mentioned, cutting many pieces out of many fabrics is a tedious business. I am not able to muster the patience it takes to stick with that kind of project from start to finish. I need some variety.
What I enjoy doing is making little kits for scrappy blocks and then work on them in small bites of time. For example, I am currently working on a 64 block churn dash quilt that will have all different background fabrics and all different “churn” fabrics for each block. I have calculated the size of a piece of fabric needed for each background and “churn” and pair them in 4 x 6 glassine bags. I stack the little kits in a basket or box and they are ready whenever I want to make a few churn dash blocks.
A couple more examples are my little house block and Lemoyne star kits. For those, I cut the pieces needed to make the block and put those in little glassine envelopes.
Fabric for the stars is chosen from the scrap bins and may contain two to eight different fabrics depending on how much of any fabric is available. Each part of the house (door, roof, wall, chimney, etc.) is made from a different fabric. It is so much fun to play in the scrap bins and try out many different combinations. It’s easier to experiment what works with so many choices rather than trying out only large pieces.
I am hand piecing the stars and houses so the little kits are stored in my hand piecing box and, again, ready to use whenever the mood strikes.
6. Keep coordinated scraps together

Caroline at Sew Can She blog has a great suggestion about saving certain groups of fabrics. If you have some leftover fabrics that look great together, save them as a group. Then, when you want to make a little project, like a pincushion, you can pull them out and whip it up. No need to spend time picking out your fabrics.
See #8 in this post for a pincushion pattern that would be perfect for these favorite scraps.
7. More information on scrap processing
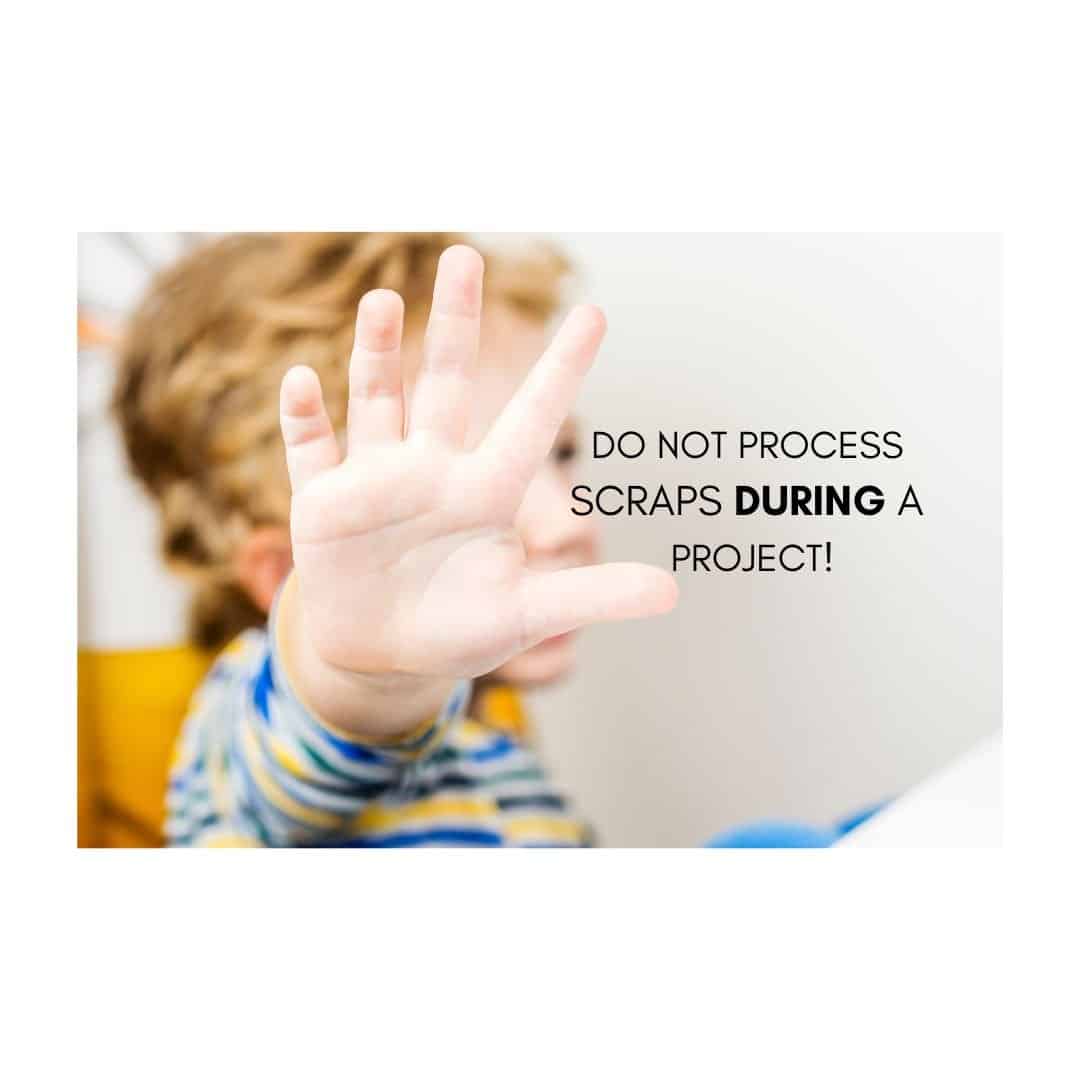
Kim, at Quilted Cloth Designs, has a whole post about the processing part of your quilt scrap storage system.
My favorite advice from Kim is that you should not try to process your scrap pieces during a project. I can see the temptation to do that so I appreciate her explaining why that’s NOT what you should do. Hint: When you’re in the midst of cutting for a project you don’t want to get sidetracked making precuts.
8. Scrap fabric project from Jeni at In Color Order

So far, there has been a lot of advice about storing your scraps so now it’s time to share a few ways to use that fabric in some cute scrappy projects.
Jeni, from In color Order, created this long scrappy pincushion tutorial and generously allowed me to share it with you. It’s perfect for holding the pins you use while machine piecing and the machine needles that aren’t ready to be disposed of yet. Click the link below to get the tutorial.
9. Scrappy Zippered Pouch Tutorial from Charise Creates
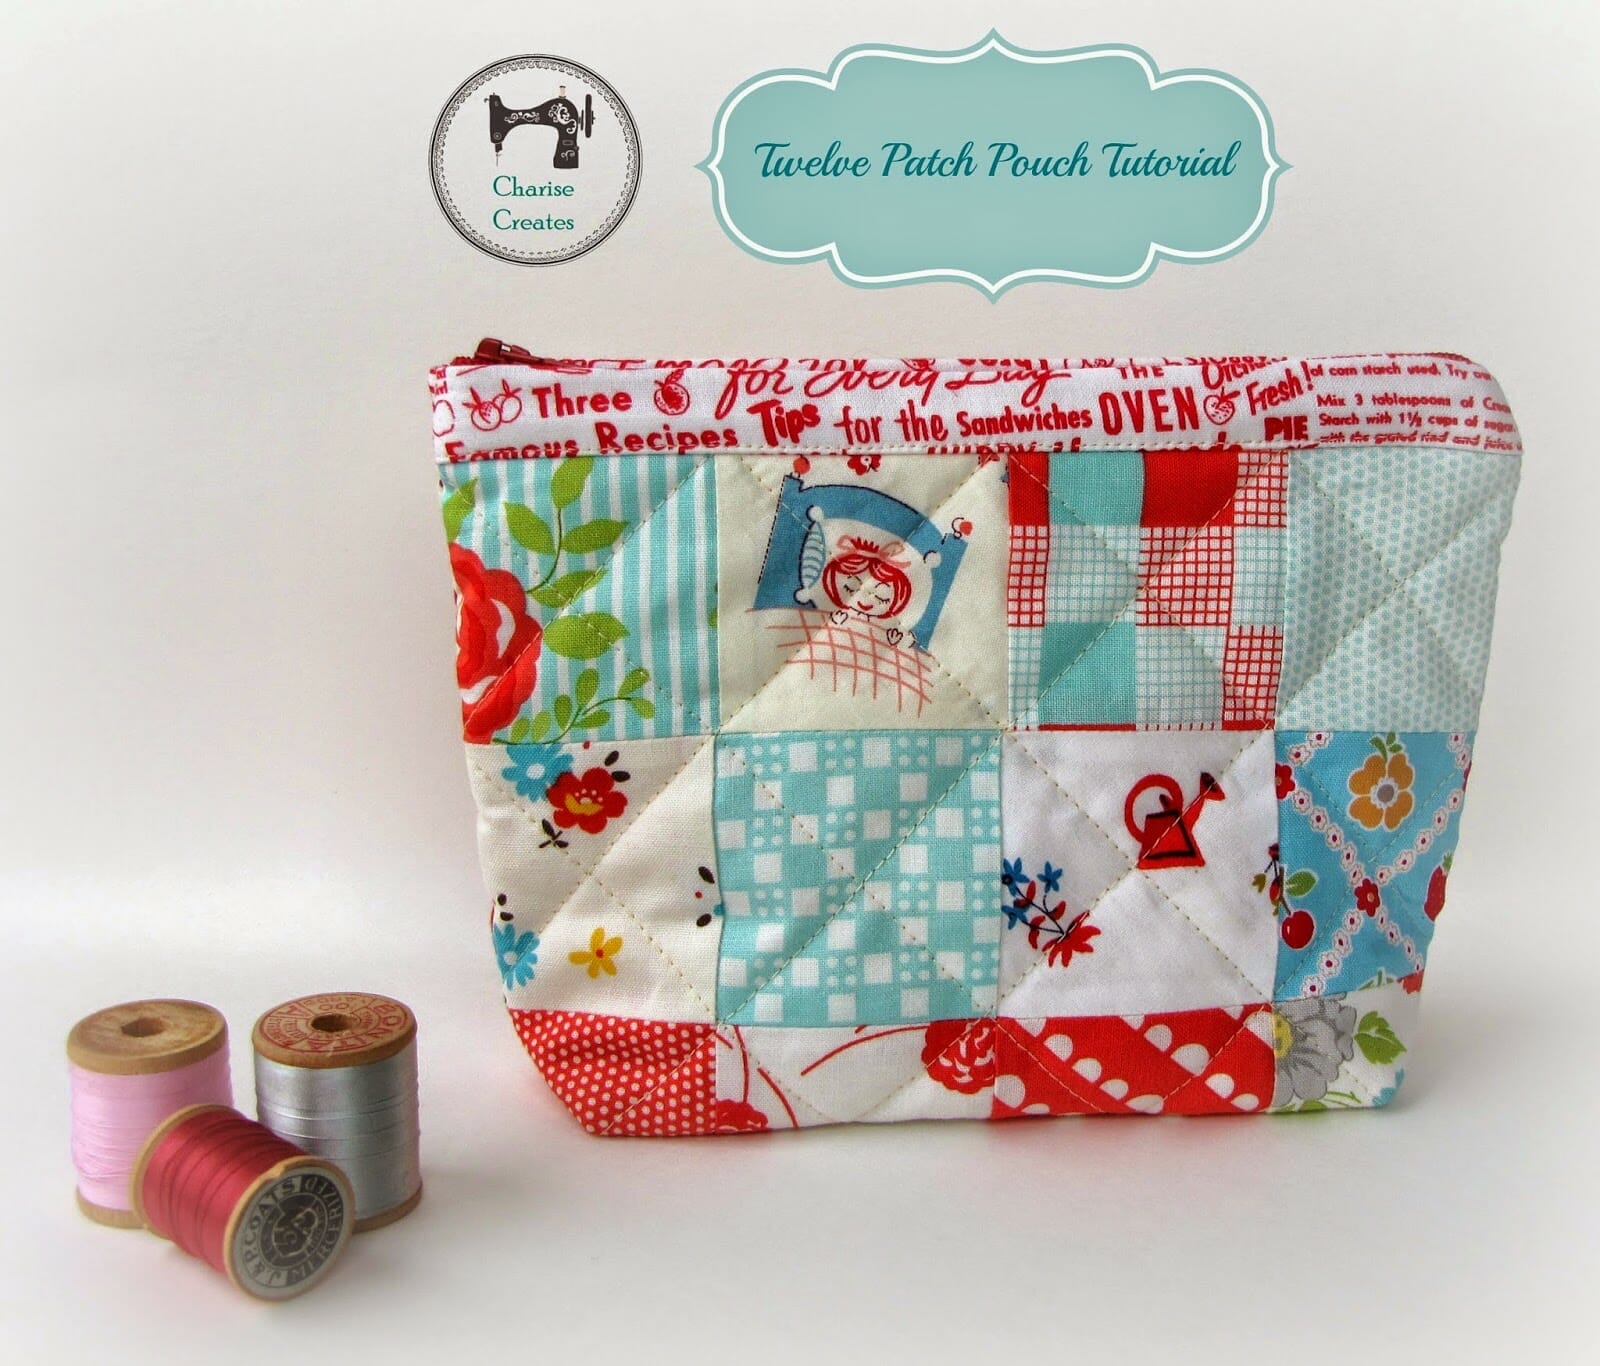
This zippered pouch tutorial from Charisse Creates is perfect for your scrappy precut squares (2-1/2″). Add a strip for the zipper section and you are all ready to sew.
Click the link below to get the tutorial.
10. Free Chicken Pincushion Tutorial
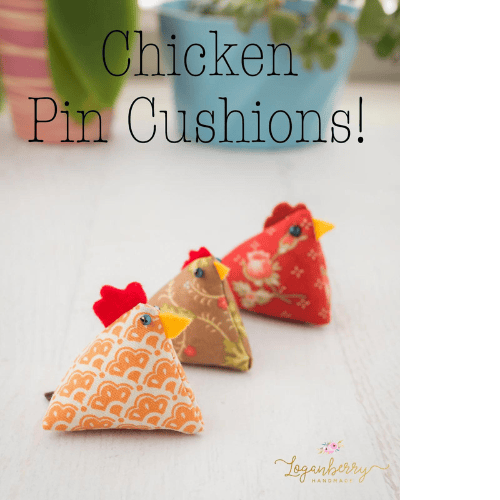
These tiny chicken pincushions by Loganberry Handmade are the cutest, don’t you think? These would be suitable to make out of your slightly larger bits of leftover fabrics. These finish at 1-1/2″ so you don’t need much.
Click the link below to get the tutorial.
Conclusion
Getting your fabric scraps organized is the first step towards creating stunning scrappy quilts with ease. Create and implement your individual approach and find a storage solution that works for you. You’ll be able to quickly access the right scraps and transform those colorful remnants into beautiful masterpieces. So, let’s get organized, get creative, and embrace the joy of quilting with our vibrant fabric scraps!
Happy stitching!